Which podcast microphones are the best to record with as a beginner?
It all depends on your budget and your tech needs.
There are a lot of options on the market. As a beginner, however, you can really narrow it down to just a few strong choices that give you brilliant quality, flexibility and simplicity.
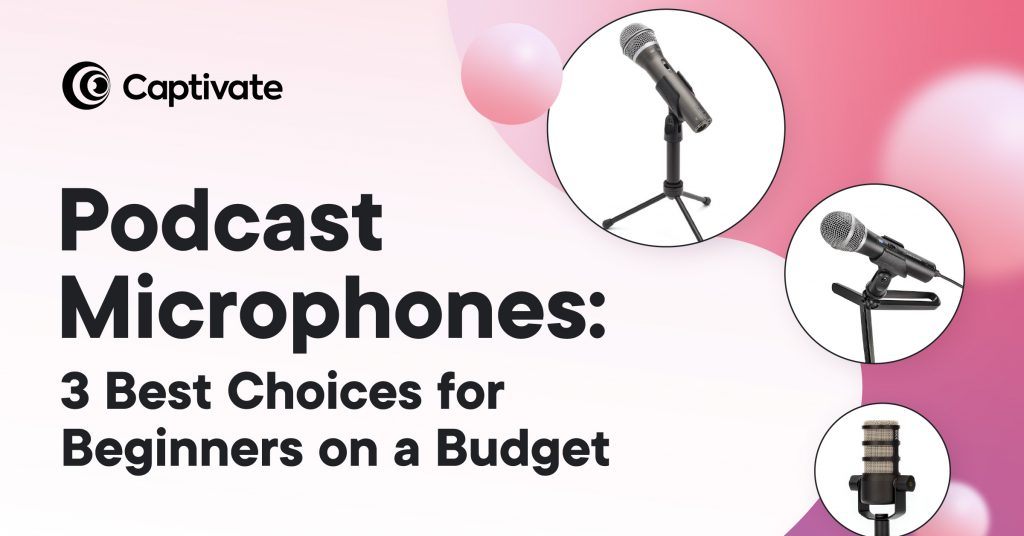
In this guide, we’ve reviewed 3 of our top choices for beginner podcast microphones available for under $100. We’ve tried and tested them all ourselves and can vouch for their quality and ease of use. Read on for our recommendations and advice on how to get the best recording setup for your space!
In this article:
The Top 3 Entry-Level Podcast Microphones for Starting Out
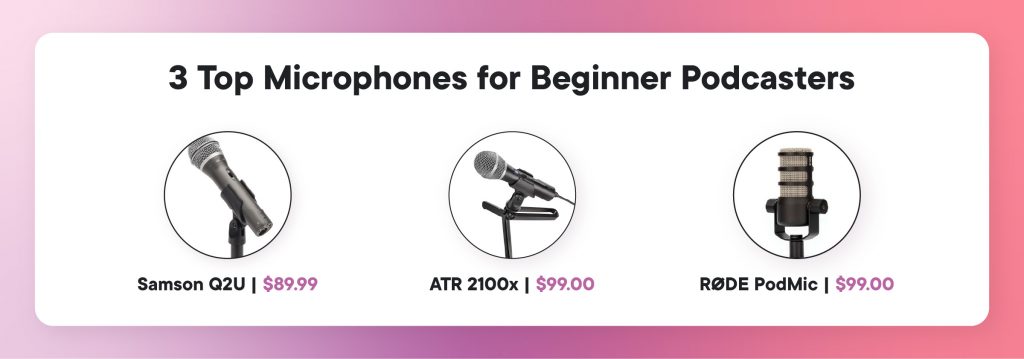
Here are the podcast microphones we recommend to every new podcaster. They’re great value, plug-and-play and all 3 come in at under $100!
Prefer to watch the video demo of these microphones? Check it out below:
Samson Q2U
$89.99 | Dynamic USB/XLR Cardioid Microphone | Amazon
The Samson Q2U is a really flexible, versatile microphone. It has dual USB and XLR connectors meaning it’ll scale really easily if you decide to upgrade your equipment, and it travels well, too. It has a cardioid polar pattern, so it’s really effective at filtering out background noise and focusing on your voice. As a microphone, it’s a compact, powerful and great value piece of kit.
ATR 2100x
$99.00 | Dynamic USB/XLR Cardioid Microphone | Amazon
The ATR 2100x is extremely similar to the Samson Q2U in terms of build, benefits and price point. Both microphones sound great and are perfect for beginner podcasters – it’s just a matter of taking your pick!
RØDE PodMic
$99.00 | Dynamic XLR Cardioid Microphone
The RØDE PodMic gives fantastic value for the amount of quality features it brings. Because of it’s XLR connectivity, it’s super flexible and will scale with your podcast setup without issue. The built-in shock mount and pop filter saves you money on accessories (but you will need to buy a stand). Because of this higher-end functionality, you’ll produce a clear, quality recording without having to worry about knocks, vibrations or clipped audio. Pretty impressive all round.
2 Notes on Choosing A Microphone for Podcasting
Before getting onto the recommendations, here are some things to consider when choosing your first podcast microphone.
Don’t Overcomplicate It!
When you’re first starting a podcast, it’s tempting to read too much into the tech and overwhelm yourself with options.
Podcast equipment is an area everyone has an opinion on, so while it’s sensible to do your research (it’s your money after all), it’s more important to just get started than try to perfect a setup before you’ve recorded a single episode.
You Can Always Upgrade Later
On that note, remember that you can always upgrade your equipment as time goes on! Tech breaks, you grow out of it, you want new toys: whatever the reason, there’ll always be new podcast microphones to splash out on further down the line.
After a few seasons or episodes, your podcast might be completely different to what it is now. It’s miles better to save your budget (if you have it) and upgrade your equipment once you know what your tech needs will be. Who knows, you might be able to cover that extra cost by then!
How to Set Up Your Microphone for the Best Sounding Audio
Now you’ve chosen your podcast microphone, how do you get the best setup for stable, quality recordings?
Check Your Cables and Connect It All Up
Most podcast microphones will come with cables, but some don’t – so check beforehand. For USB microphones you will need a USB or USB-C cable (check which type of port your computer has first). Then, all you need to do is plug in both ends and you’re ready to record!
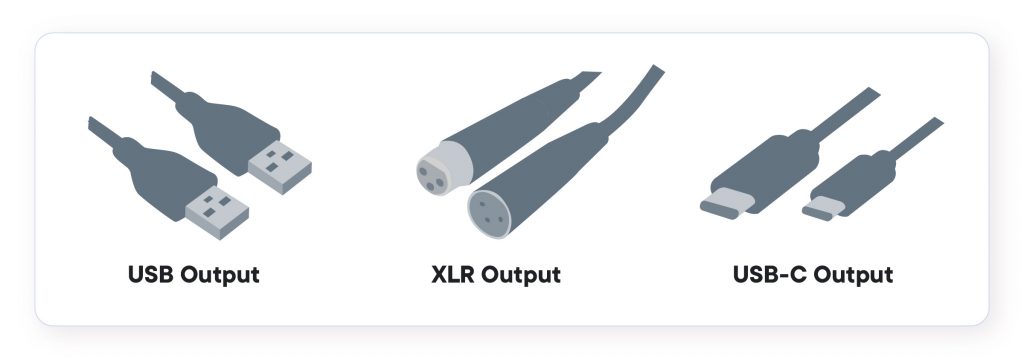
For an XLR microphone, you’ll need two cables. One XLR cable from your mic to your interface, and one USB or USB-C cable from your interface to your computer.
When you’ve checked your connections, remember to position your microphone correctly. A good rule of thumb is to place the microphone around 6 inches (or a fist’s width) away from your face. Try to angle the microphone so it sits comfortably in front of your mouth without you having to strain your neck or bend your head too much.
Once your mic is set up, it’s good practice to run a quick microphone test to check everything’s working and positioned correctly. You can do this by simply hitting record in your software then listening to it back through your headphones or using an online test like this one.
[optin-monster slug=”eoc5h1umeavzetgqb3ox”]
Get Hold of These Microphone Accessories
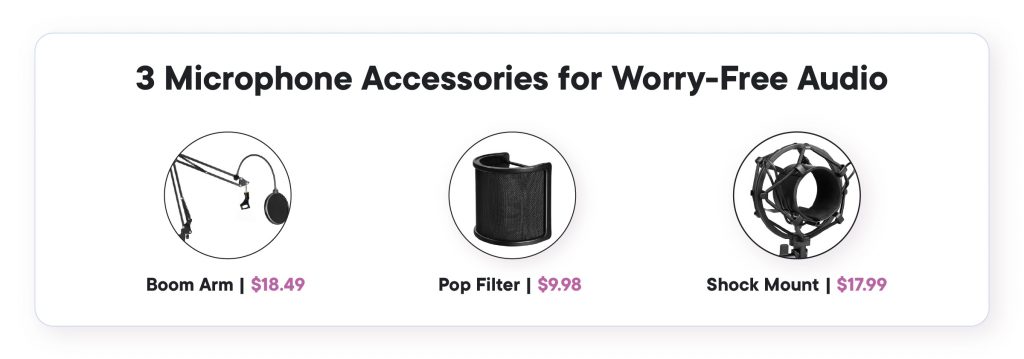
Here are some accessories you don’t need, but you might find useful. They’re inexpensive, easy to find and will definitely help your recordings go smoother.
Another article we think you’d like...
Reading Time: 3 minutes In this free upgrade, all Captivate podcasters can now exclude episodes from their RSS feed AND set auto-expiration dates on episodes!
Microphone Stand
Ok, so this is more of a must have than a should have. A microphone stand is an essential to keep your audio levels consistent and stable throughout your recording (who wants to arm cramp from holding a mic for an hour, anyway?!)
Both the Samson Q2U and the ATR2100 come with their own tripod-style microphone stands, but you’ll need to buy one if you’re using the RODE PodMic or another model.
We recommend: Neewer NW-35 Microphone Boom Arm Kit | $18.49
Pop Filter
A pop filter is placed over the top of your microphone to filter out the plosives and harsh sounds the popping p’s and bassy b’s that everyone has in their speaking voice. Having one in place will create smoother, warmer audio (and an easier edit for you!)
We recommend: Metal and Mesh Pop Filter | $9.98 or Microphone Mask Shield | $7.79
Shock Mount
Attaching a shock mount to your microphone stand will reduce any vibrations, knocks and disturbances that your microphone could pick up.
We recommend: Universal Microphone Shock Mount | $17.99
Check Out Our Podcast Recording Guide
It’s extremely achievable to create high-quality recordings in a non-pro setting or at home, even with zero budget. A lot of household items (like towels, rugs and blankets) can be used to insulate your environment and absorb background noise. You can also use boxes to surround your microphone and create a booth-like effect.
For lots more DIY recording setup tips, recording how-tos and software recommendations, take a look at our dedicated podcast recording guide. In the guide, you’ll find our best advice for recording in lots of different settings, including remote recording, recording with multiple people and even recording on your phone.
Podcast Microphones Explained: The Different Types of Microphones and What They Mean
Podcast microphone shopping can be a bumpy ride. You’ll encounter a lot of opinions (and a LOT of overcomplicated jargon). To cut through the noise, here are some plain-English definitions for terms you might come across in your research – no sound engineering qualification required.
USB vs XLR Microphones
A USB microphone has an output that you’ll connect to your computer via a USB cable. These mics are perfect for beginners and solo podcasters due to how simple they are to use. There’s no need to purchase extra kit in order to use this type of mic; instead you can just plug it in and record directly into software like Audacity, Garageband, Squadcast or Descript.
XLR microphones are widely used across the audio industry, so there are plenty of options when it comes to product choice. XLR mics are great if you’re recording in person with multiple people, or if you want a bit more flexibility/scalability to your setup. However, you can’t just plug an XLR mic straight into your computer – you will need an audio interface or mixer to funnel your audio into your chosen recording software.
Dynamic vs Condenser Microphones
A dynamic microphone is a reliable and forgiving microphone that is good at rejecting ambient noise and isolating your talking voice. This means if you’re recording at home or in a non-studio setting, you’re less likely to pick up background disruptions that you’ll have to edit out later.
Examples of dynamic microphones for podcasting: Samson Q2U, ATR 2100 + 2100x, RODE PodMic, Shure SM58, Heil PR-781.
A condenser microphone is very sensitive to sound and will give you quality, precision recording. Although this sounds ideal, it doesn’t translate super well to (nor is it really necessary for) an at-home or beginner’s podcasting setup. Unless your environment is well insulated or you’re recording in a professional studio, you’re likely to get a lot of background noise.
Examples of condenser microphones for podcasting: Blue Yeti, Blue Yeti Nano, Audio-Technica AT2020.
Polar Patterns
A microphone’s polar pattern refers to how it picks up and channels sound. Unless you’re an audio engineer or a geek like me, you don’t need to lose sleep understanding them. Nevertheless, it’s useful to know the basics so you know what you’re spending money on.
The most common polar pattern for podcasting mics is cardioid. Cardioid means your microphone will pick up sound from directly ahead (aka your voice speaking into it). It will pick up very little sound from behind, and a little from the sides.
Choose The Best Podcast Microphone For You with the Podcast Launch Accelerator
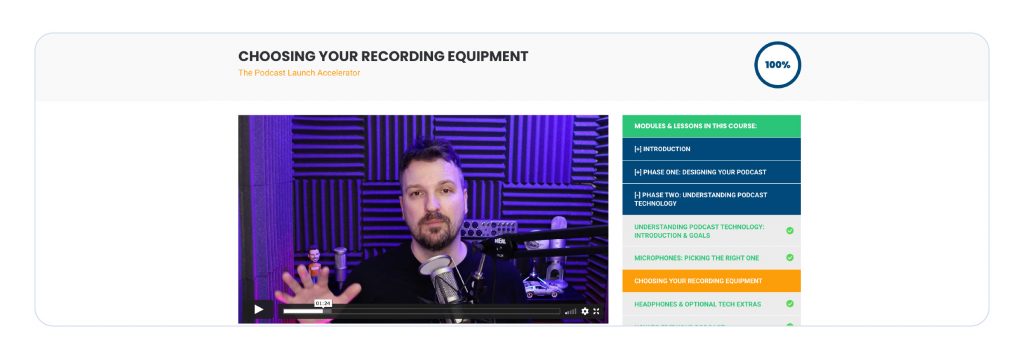
Starting your first podcast is an exciting but daunting time! There are so many decisions to make, and it can be hard knowing what to do, when and why. We created the Podcast Launch Accelerator course and crib sheet to help you make big decisions – like choosing your podcast name, format and set up – a lot smaller.
In the free course, we walk you through all equipment options (including microphones, headphones, studio setups and software) for every budget. We make it easy for you to set yourself up with the best equipment quickly, so you can get podcasting that much faster!
What To Do Next
- Sign up to the free Podcast Launch Accelerator course to get video demos of all the microphones we’ve recommended here, as well as editable templates, resources and simple exercises to help you launch your first podcast!
- Not quite ready to commit to podcasting just yet? Follow How to Start A Podcast for our simple, no-jargon process to launch a growth-ready podcast within days!
- Once you’ve picked up your perfect podcast microphone, learn How to Record A Podcast with our 8 Tips for A Great Sounding Show.
- When you’ve finished recording, check out our guide to Podcast Editing Basics: The Best Tips and Software for Beginners.

